

A correct and strong position allows you to use your aids independently and effectively to influence your horse and helps you to be a more confident rider. Yet, developing and maintaining a solid position and coordinating the aids is at the heart of many riders’ problems. The theory may be simple, but it’s not always easy to execute.
I’ll explain what I like to see in a rider’s position and how to use your aids to communicate with your horse. Then, I’ll share a simple jumping exercise that will help you focus on your position and aids, which directly applies to riding courses.
Position Check: Do’s and Don’ts
A correct and balanced position allows you to use your aids independently and effectively, but also softly and invisibly. Clashing or overbearing aids can result in an inharmonious or choppy ride, or worse—a confused or unwilling horse.
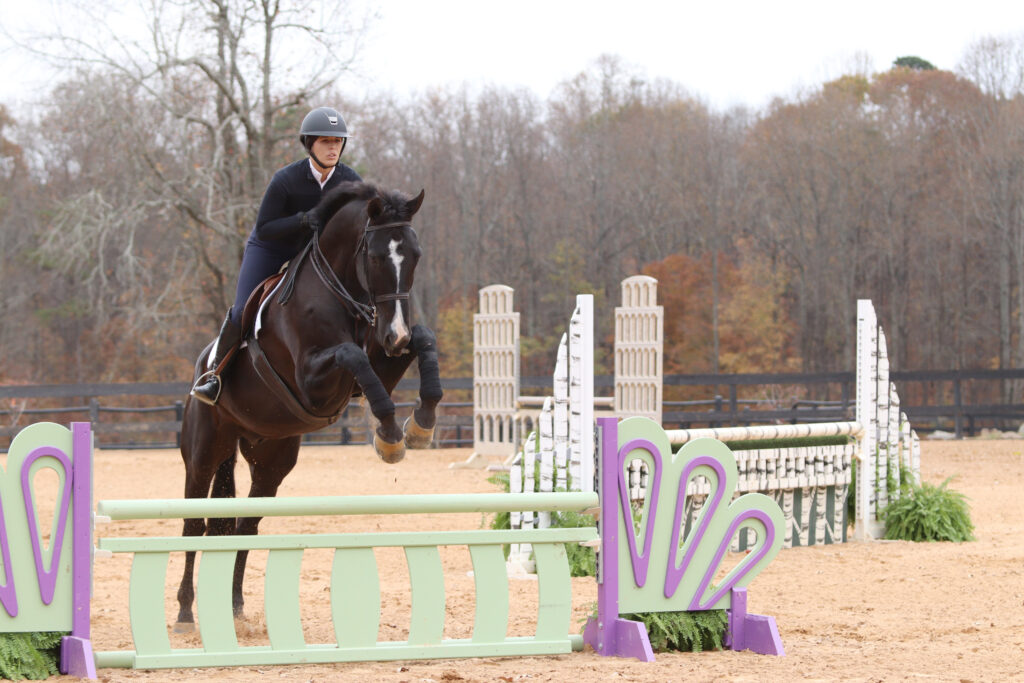
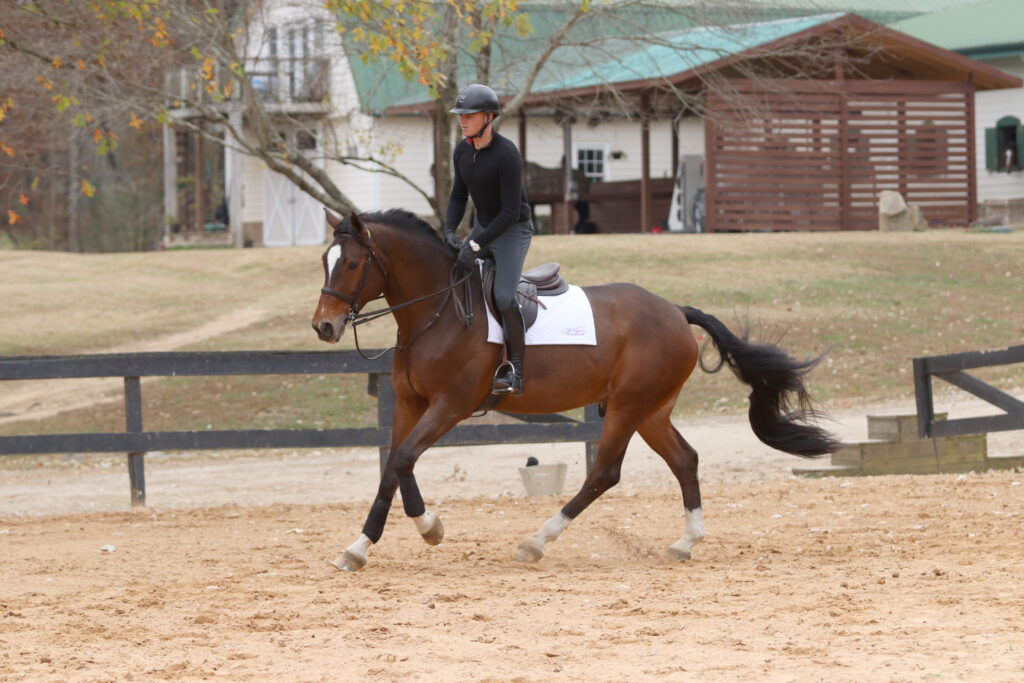
First, we’ll look at the base of support, or lower-body position, from the feet to waist. I consider the leg to be the foundation and most important part of a rider’s position. There should be an even distribution of contact between the calf, knee and thigh. The stirrup irons should be positioned on the balls of your feet at a diagonal angle, with the inside branches of the stirrups slightly behind the outside branches. Your heels should be down with weight in them to absorb concussion and so your legs can be as long as possible—almost like you are wrapping your legs around the horse’s belly.
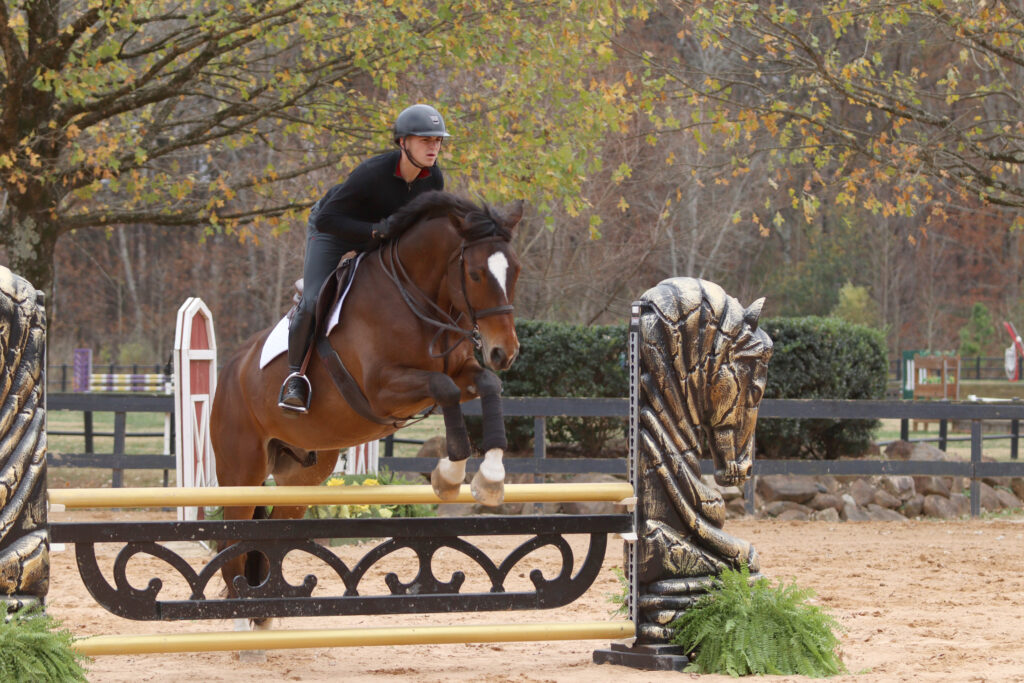
Some riders incorrectly lift their heels, which puts more weight on the balls of their feet. When landing from a jump, this causes you to press into your knees and onto the horse’s neck because there’s no support to anchor you. Landing on the neck and out of balance can get you in trouble, especially when jumping into a line because it may take a couple strides to sit up, recover and be effective. At that point, you could be halfway down the line and it’s going to be too late to make adjustments.
Next, looking at the other angles in the base of support, the knee angle from the thigh to the lower leg should be about 90 degrees, however, this can vary depending on your body type. If you have short legs, you might have less angle than if you have long legs. The hip angle is the thigh’s relationship to the upper body. If you lean forward, you’re closing your hip angle, which raises your seat out of the saddle, and allows the horse to move forward more freely (picture a jockey on a racehorse). If you lean back, you’re opening your hip angle, which encourages the horse to collect and decrease his pace.
Moving to the upper body, your back should be flat, with your eyes looking ahead and your head over your shoulders. The visor on your helmet should be parallel to the ground.
Your wrists should be straight and there should be a bend in your elbows. It’s very important to have soft, independent hands and relaxed arms so that only the hinges in your elbows open and close. When posting to the trot, as you sit down, your elbows should bend. When you rise, your elbows should straighten a little. In the canter, your arms stay relaxed as your hands follow the motion.
The reins should be free from twists. If you are riding your horse in a pelham, hold the snaffle reins on outside of the curb reins, with your little finger in between the two reins and your thumb on top of the reins.
When stepping back and looking at your whole position, it should be in alignment, with your lower legs straight down underneath you, and an imaginary line that goes through your shoulder, hip and heel. Another imaginary line goes straight from your elbow to the horse’s mouth.
Flatwork Warm-Up
In flatwork sessions before jumping, ask your horse to balance, lengthen, shorten, move laterally and stay straight, change leads (whether simple or flying) and make sure to spend the same amount of time in both directions to keep your horse even. If your horse can go forward and back, and left and right, you’re on track to have a nice, adjustable horse for jumping.
The warm-up is also a good time to test your horse’s response to your leg aids. I believe every horse has his own ideal rhythm and pace to jump from, and it’s the rider’s job to find it, so that the horse is in front of the leg and light in the hand.
A horse who is in front of the leg has impulsion, energy, and covers ground, and you can more easily make adjustments because the horse has more gears to work with. A horse behind the leg is dull and his canter is up and down instead of forward, which makes it hard to make adjustments. If the horse’s canter is slow and weak, there aren’t any lower gears to decrease the pace or shorten the stride without him breaking to the trot.
You should be able to apply your leg aid in varying degrees and soften with your hand to ask your horse to go forward or lengthen his stride. I like to think of it as asking, telling, making—in that order. Start with a light squeeze from the calf to ask the horse to go forward. And then if that’s not effective, add a cluck and then the spur. Some riders make the mistake of using the spur and the leg together at the same time, which can give the horse spur marks and it can make the horse numb to the aids. The spur should only be used as a reinforcement to the leg. If the spur doesn’t get a response, tap your horse with your stick directly behind your leg.
You also need to be able to relax your leg and close your hand to slow your horse’s pace and shorten his stride. If you use leg with no hand, your horse will go faster and end up on his forehand. Conversely, too much hand and not enough leg may cause him to break or lose too much power. The ultimate goal is for the horse to carry himself.
Figure-Eight Exercise
This is a simple exercise, but all the things you’ll focus on are the same tools you need for seamless jumping rounds. You’ll work on maintaining a forward rhythm and pace, staying on the track and influencing the lead—all while trying to keep your aids invisible.
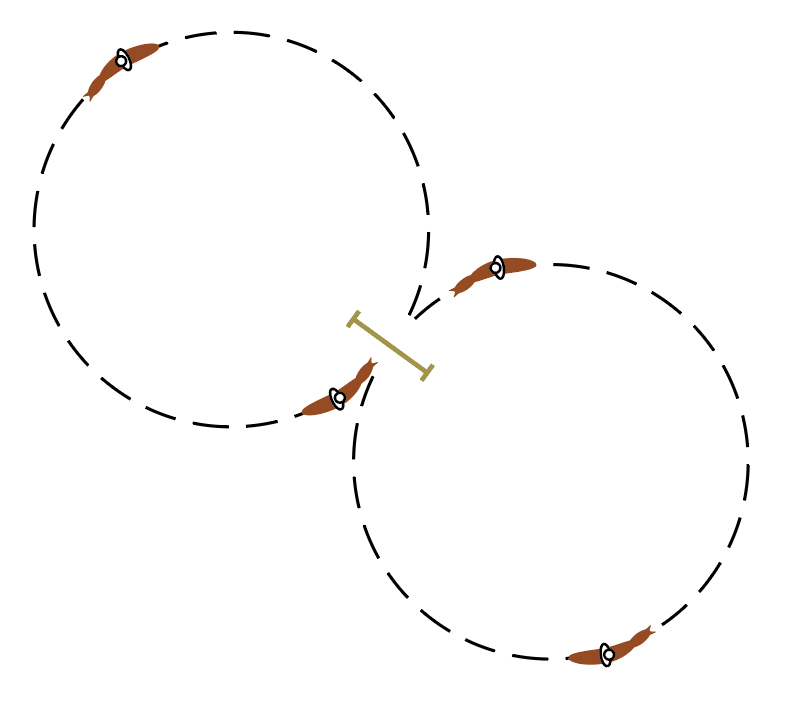
First, you’ll ride a figure-eight pattern on the flat. Then you can add a pole in the middle of the figure eight. You’ll first work over the pole on a circle and if that’s easy, you can add the full figure-eight pattern with a pole or jump in the middle (see diagram, above).
Start with trotting the figure-eight pattern. Be precise about the track by keeping your horse between your hands and legs in a chute. Try to ride the exact track every time, so that your horse’s hoofprints are landing in the same place. Alternate with right or left leg pressure if you feel your horse drifting off the track. If he bulges to the outside, use your outside leg and bring your hands slightly to the inside, with a slight opening inside rein and outside bearing rein. If your horse falls in, use the inside leg to push him out, while both hands shift slightly to the outside, with a little opening outside rein.
Once it’s going well in trot, try it at the canter and keep the same principles in mind. Keep your horse in front of leg, on a rhythm, with every canter stride the same. Change your lead in the middle of the figure eight by using a simple change through sitting trot.
After you’ve practiced the figure at the canter, you can add the ground pole. You still want to think about this exercise as flatwork, just with a pole (or a jump) in the way. Before attempting the full figure eight, canter a circle over the pole and then if that’s easy, a low vertical. Think about dividing the circle into thirds (see the diagram below).

1.) Create, or set your canter,
2.) maintain it to pole or jump, and
3.) land, determine if you have the correct lead, and assess the quality of the canter—is it the same, faster or slower? If it’s faster or slower, regain your original canter.
Don’t interrupt the canter rhythm by making adjustments. Your horse can do this on his own if he’s balanced and the rhythm is consistent. If you can maintain the same rhythm on the whole circle, then change direction and proceed with the full figure-eight pattern. Just like when you were riding on the circle, keep the same rhythm and balance throughout the figure-eight pattern.
To get the correct lead over the pole or jump, use a little pressure on the rein that’s on the same side as the lead you want your horse to land on, along with a little pressure with the opposite leg. So, if you’re coming off a circle to left, use a right opening rein off the ground and pressure with your left leg to get the right lead. Make sure you’re using a very soft connection so that you’re not causing the horse to lose his form in the air. If you get the wrong lead, bring your horse back to trot and pick up the correct lead.
On the landing side, focus on keeping your heels down and landing in your legs, so you are in the correct position and are ready for what’s coming next. If you don’t land in your legs, you may land on horse’s neck, making him unbalanced and on his forehand, which will make it harder for both of you to recover.
If your position is solid and secure, you’ll be able to make adjustments with practically invisible aids. The end result is a confident and harmonious partnership able to achieve effortless jumping rounds.

Practical Horseman thanks Michael Britt-León and Windsor Stables in Milton, Georgia, for providing the facility and horses for the photos in this article.
About Holly Hugo-Vidal
Trainer, judge and clinician Holly Hugo-Vidal is based out of Brownwood Farm in Milton, Georgia. Her mentors include former husband Victor Hugo-Vidal, with whom she ran successful show barn Cedar Lodge Farm in Stamford, Connecticut; and show jumper Rodney Jenkins. She is the author of the book “Build Confidence Over Fences!”
This article originally appeared in the winter 2025 print issue of Practical Horseman.